Kreinik has republished the list of thread colors they’ve had to discontinue because they can’t get the materials to make them any more. Kreinik suggests you print out the list and put it with your thread stash to consult before you start a project that needs a lot of one of their threads or before you try to kit an older project with a specific thread list.
http://kreinikthread.blogspot.com/2019/04/discontinued-kreinik-thread-colors.html
Monthly Archives: April 2019
Fun with Mille Fleurs
The Edwardian Needle: Spring/Summer Class Schedule

Shibori Butterfly Box
The Edwardian Needle in Fairfield, New Jersey, is offering some fantastic classes this spring and summer. So if you’re looking for a new project or a new skill, consider signing up for the following:
MAY
Saturday & Sunday, May 4 – 5 (10 am – 4 pm) – Betty Pillsbury: piecing a crazy quilt on Saturday and embellishing & seams on Sunday ($235)
Memorial Day, Monday, May 27 (Noon – 4 pm) – Pam Miller: beginning level ribbon embroidery ($95)
JUNE
Sunday, June 2 (10am – 4 pm) – Andrea Santiamo: bargello patchwork piece ($170)
Friday, June 28 (Noon – 5pm) – Tony Minieri: studio ($50)
JULY
Saturday & Sunday, July 13 – 14 (10am – 4pm) – Betty Pillsbury: shibori butterfly box ($245)
Sunday, July 28 (10am – 4pm) – Andrea Santiamo: bargello pocket book ($170)
AUGUST
Sunday, August 18 (10am – 4pm) Pam Miller: intermediate ribbon embroidery (large ribbon initial)
As you all know, you can find The Edwardian Needle at 390 Fairfield Road, Fairfield, NJ (973-743-9833).
We’ll keep you posted about new offerings at other local needlepoint stores in the near future. In the meantime, happy stitching.
SOTM – April 2019
Eleven of our group met on this beautiful Spring Saturday to continue our SOTM projects. Nine of the stitchers worked on this year’s project – the ANG SOTM.

Joan

Nancy

Mally

Sylvia

Marge

Rosie

Jill

Sue C

Linda
Two of our stitchers worked on catching up with past projects.

Margaret

Amy
As always, we enjoyed stitching as well as chatting. What better way to spend a few hours?
Happy Stitching!
Pliers, Flat Irons & C Clamps
“What’s that?” I asked Andrea over the din of last year’s Needlefest.
The room was large, noisy and yet cozy with stitching friends catching up on news and projects. She and I had sat next to each other, and I couldn’t help but notice the pliers she extracted from her project bag. She turned her small needle nosed pliers one way then the other for me to admire and explained that she used the tool to pull the end of threads through stubbornly tight stitches on the back of her canvas.
A relative newcomer to stitching, I loved the idea that I could raid my husband’s workshop to improve my needlepoint. (He’s been smart enough to ignore the occasionally borrowed pair of pliers ever since.)
And recently I wondered what other hardware, drug and office supply items my stitching friends were using to up their needlepoint game.
So I asked them all at our most recent “Stitch of the Month” session. The answers came fast and furiously:
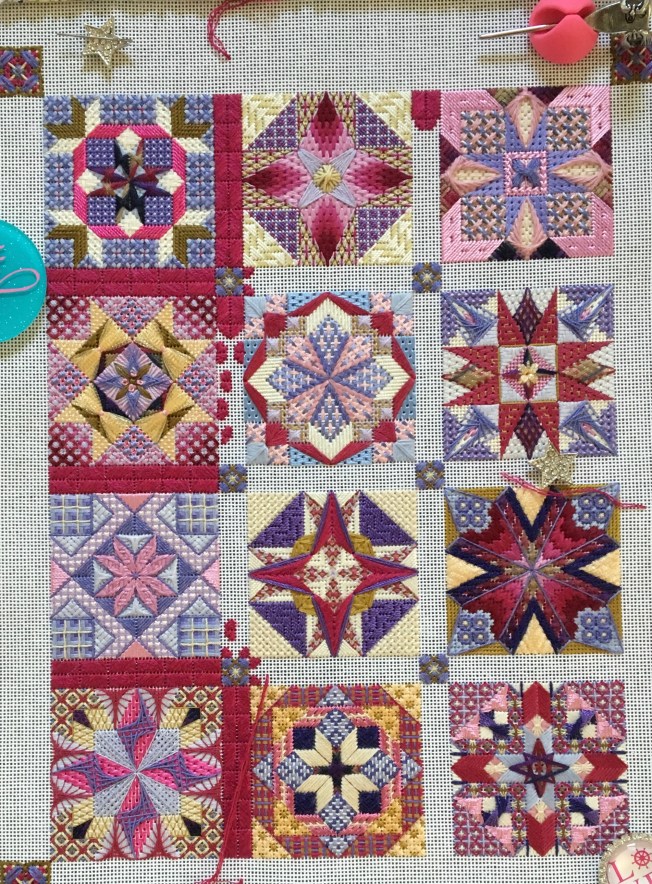
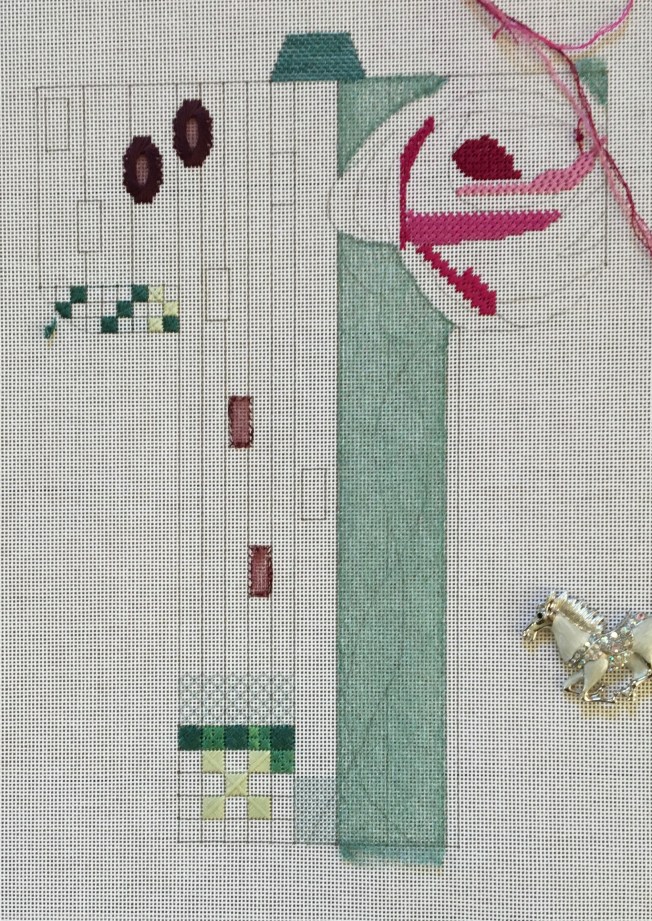
To pull the ends of stubborn threads through stitches on the back of your project, try hemostatic forceps, needle nosed pliers, tweezers or a one-to-two inch square piece of nonskid rug pad material.
A meat mallet can help you assemble a wooden needlepoint frame. To protect the wood, place a pot holder on top of the spot you’ll be pounding.
A pill case like this one – https://www.travelsmith.com/product/am-pm-vitamin-pill-case.do– can keep needles organized, which is especially helpful if you’re carrying multiple types to class(es).
To straighten out neon rays and other “kinky” fibers in a flash, use a small flat iron. If you’re planning to use the device throughout a stitching session keep everyone safe by resting the flat iron in a mug.
To hold multiple threads as you work, gently attach magnetic paper clips like these – https://oliblock.ecwid.com/Small-Magnetic-Clips-c22190385 – or quilters’ clover clips to the edges of your canvas.
An industrial C clamp can be used to attach your project to a table and stabilize it while you work.
Try making your own needle minder to perfectly match your new project. All you’ll need are two small craft store magnets, industrial strength glue, such as E6000, and charms, unusual buttons, or pieces of leftover fashion jewelry.
I’ll take the blame for including this last item, which finds a place here mostly because I never expected to hear these three words uttered together: magnetic; bingo; and, wand. Yep. If some of your needles are MIA on the floor, try sweeping an inexpensive magnetic bingo wand over your rug. It’s a thing.
Thanks especially to Margaret, Linda, Rosie, Jill, Sue, Marge and Amy for sharing this information.
Happy stitching, everyone.
EGA Regional Seminar
Hi Everyone —
This past weekend I attended my third EGA Metropolitan Region Seminar in Madison, NJ. Usually, I just take a class, but this year I was responsible for coordinating the Opportunity Basket Auction. I was nervous about handling the large amount of cash, but in the end everything balanced to the penny and the money was distributed without incident.
I had initially signed up to take studio time because Opportunity Baskets and, DUH, UFO’s! But, when I was in Scotland last summer, I bought a Mackintosh Rose tote bag on deep discount and convinced myself that I had signed up to take Toni Gerdes’ Mackintosh Rose Kimono. So imagine my surprise/disappointment when my registration came and said “Studio Time”.
The Mackintosh Rose tote bag and Toni’s Kimono!
Luckily, I knew the registrar and was able to change into Toni’s class! Charles Rennie Mackintosh was known for his Mackintosh Rose stained glass windows, but the motif appears throughout his designs.

A set of tiles in the Mackintosh Rose design. Can you see the source of Toni’s inspiration?
(As an aside, Toni is doing a series of artist-inspired kimonos: The Wright Kimono taught at ANG in Chicago, The Mackintosh Rose Kimono, The Klimt Kimono to be first taught at ANG in Houston, and The O’Keeffe Kimono in design for ANG Tucson.) Are you tempted yet?
As usual, Toni’s class was awesome and I came away with some new techniques and ideas for use on other projects. One of these was Wonder Ribbon and the other was the best ever use for Flair! Here is my progress at the end of two days:

The Wonder Ribbon appears in the bottom right corner of the design. This ribbon started as about a 3/8-inch wide tube. It stretches when you pull on the sides and goes back to its original shape when you pull on it lengthwise. So you can pull it into any number of shapes; the website says it is good for waves. It comes in five widths. (Carol, do you remember those necklaces we bought in Mexico? Same idea.) Toni had us use two balloon sticks to widen the ribbon to the approximate width that we needed and then tack it down with Accentuate. The ribbon will be stitched over when the design is nearly done.

A close-up of the Wonder Ribbon. Note that you can see the canvas through it!
For any of you who have stitched with Flair, you know what a mess it can be. I promised you the best use ever, so let’s look at rosebud on the Kimono, Here’s a close-up:

The center of the rosebud is Flair that is stretched open and tacked down in exactly the same fashion as the Wonder Ribbon. An oblong Jessica is stitched over it. The Flair fills in the center of the Jessica. It creates a translucent effect and IMO is the best idea ever! When I said that to Toni, she suggested that Wonder Ribbon or Flair, depending upon width, would be great for windows — covering the area, but receding as well. I plan to try it out on Lombard Street and The Neighborhood!
I HOPE to finish this piece since it is my remembrance of Scotland. However, the kit came with two spools of the same color of Accentuate…….
Cheers, Rosie

You must be logged in to post a comment.